
Our Week in Rome: Inspiration and Craft Ideas for Parents, Teachers, and Caregivers
Welcome to the July 2014 Carnival of Natural Parenting: Family Vacation
This post was written for inclusion in the monthly Carnival of Natural Parenting hosted by Hobo Mama and Code Name: Mama. This month our participants have shared their family-travel tips, challenges, and delights. Please read to the end to find a list of links to the other carnival participants.
***
I am an AP nanny, and part of the fun of my job is planning cool activities to do with my kiddos. We love learning about different countries through activities and books; celebrating their holidays, learning their languages, and so on. Although I would love to take the kiddos to each and every one of these places, I simply don't have the resources to do so; doing projects from home allows us to experience the cultures of many places, even though we cannot journey to them. Last week, per the girls' request, we learned about "Ancient Rome," with Roman-themed food, activities, and stories. This post is basically a giant photo dump with accompanying descriptions, explaining the activities that we did. We adored learning about Roman culture and society, and doing it in a hands-on manner made it more accessible for the kids. I hope that these ideas will help you--maybe they will inspire you to try a Roman week with your kids, as well!
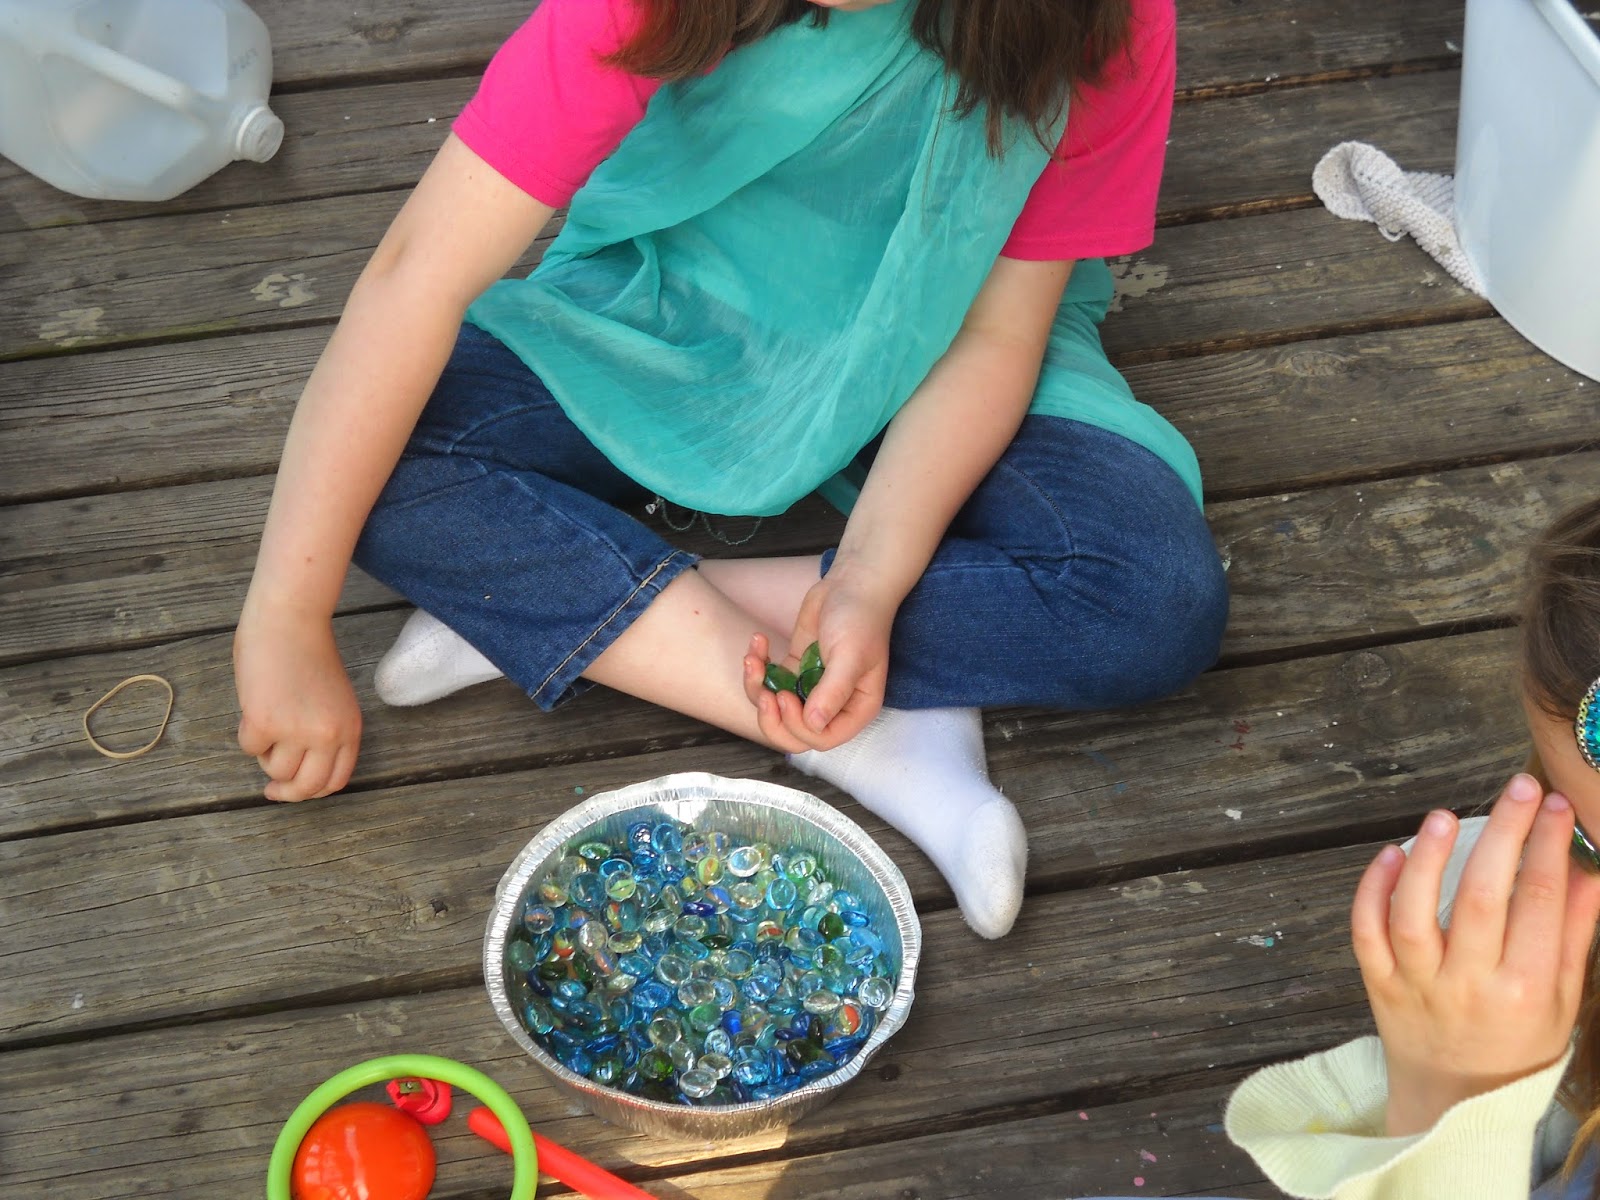 For some reason, the girls are super entertained by these flattened marbles. I'm thinking about adding them to our sensory table next. They are super cheap and tons of fun.
 First project! We made wax tablets with old milk cartons and natural clay (which can be found in almost any creek or river). These were fun to make, and super simple. The girls enjoyed drawing with them and pretending they were Lupus from the Roman Mysteries. We also had styluses so that they could draw in the clay without getting it all over their fingers (we are sissies); I recommend chopsticks or knitting needles for this (you can get chopsticks for $1.00 at Daiso), but, because I am poor and there is no Daiso near my house, I didn't follow my own advice. Juno is using four or five plastic knives bound together by a rubber band. Adora is using a plastic stick that I found in my house. Do as I say, not as I do, hehe.
 Because we're happy!
 Adora's toga (and her wax tablet and stylus). She chose that colour--I think it's great.
 That ethereal blue thing is Juno's toga (sorry that the photo isn't great). The togas are just scarfs, pinned on with a safety pin. If you have a baby wrap, that would work perfectly as a super cute toga. If not, simple scarves are great. We used really thin ones, because it was HOT!
 We also made "frescos" (paint on wet clay--we discussed how real frescoes were done on wet plaster, so that when the plaster and paint dried together, the paint would become waterproof). This is Adora's. They dried really well and were quite cute.
 Juno's fresco. The natural clay, by the way, turned out to be insanely useful. I trekked down to a creek and brought home a huge bucket, and I think we used it on every single "Rome" day. It is so useful, and it's free! Awesomesauce stuff.
 Next up, Roman crowns! This is Juno's Roman crown (a laurel wreath, of sorts. Wire and foam flower stickers). These are super easy to make, and are fairly durable; I formed the crown base by weaving the wire into a ring. Then, the girls stuck the stickers that they chose onto paper and cut them out (this way, the sticky back cannot become tangled in their hair). And lastly, I hot glued the flowers onto the crown. Instant, easy Roman crown!
 Adora's crown. She was very particular about the colours she chose. I think it turned out fabulously!
 We also made Roman coins out of the natural clay. We loove natural clay (have I expressed that clearly enough? We seriously love it)! Juno decided to form them, and Adora elected to decorate with flattened marbles, seashells, and rhinestones (team work makes the dream work). We left them out to dry in the sun, and they turned out beautifully.
 Adora decorating the coins. She came up with all of the decorations herself; it was really cool to see her brain working in this way. The different sized holes, in addition to the gemstones and seashells, signify different money values. The bigger the hole, the more the coin is worth. I'm not 100% sure of the significance behind the gemstones, but hey, sparkles rock.

 LOVE!
LOVE!
 MESSY HANDS! To me, this represents a job well done.
 Sparkly coins, waiting to dry in the sun.
 We also made out own sandals (I wish I had more pictures of these, because they were pretty cool, but Juno was having a bit of a crisis with which I was attempting to compassionately deal, so the picture taking kind of got thrown to the wayside. Adora actually took this of her own feet, hehe. Thanks, Adora!). This was a really fun and easy project. I thought I would put simple instructions here, because this project is a TINY bit less user friendly than the others.
You will need:
Bungee cord-type string
Old flip flops
Scissors
Rip out the plastic thongs of the old flip flops, so that you have a foam base with which to work.
Cut the foam base so that it will fit your child's foot.
Bore holes in the base at any place where you child says that he or she would like the strap to be placed. This can be done by inserting the scissors strait down into the spot your child indicated, and then twisting the scissors until they are through to the other side. You may need to cut out additional foam to fit the cord through, depending on how big the scissors are.
Cut the cord to the correct size, put it through the holes, and tie it to secure. Be sure that you have your child try the shoes on, to ensure that they are not too tight.
And you're done! Easy recycling project, and cheap new shoes! And they are more comfortable for kids than flip flops are, according to the girls.
 We are always babywearing.
 And legoing. Crafting breaks for the win.
 Adora remembered that during Rome Week last year, we made homemade perfume with flower petals, and she requested that we make it again. Easy project. Collect flower petals, cut them off the flowers, and put them in a cool bottle along with water. Done. All natural, sweet-smelling perfume. Above are the flowers that Adora chose to place in her perfume. Cameo by Luna.
 Juno's perfume! She names it "Summer Days." Adorable.
 Adora's perfume, "Summertime Breeze."
 SOO cute! I thought that this was an especially fun project; really easy, all-natural, and the girls adored it.

Making Roman shields! Cereal box cardboard pieces, cut into the correct shape, then covered with tinfoil to make them shiny. The girls then pained on the designs themselves.

 Juno's snake.
 Making a Roman market! This one deserves a little bit more explanation.
When I was in elementary school, I loooved Vacation Bible School. I got to eat (basically my favourite thing), to make cool crafts (AMAZEBALLS), and to sing songs (YESS), so I thought it was pretty much the coolest thing ever. And sometimes they gave me free toys. As you can imagine, I was thrilled.
One of my favourite Vacation Bible Schools was called "Gone Fishing." It was arranged by a few huge churches that pooled their resources to turn a large plot of land into Ancient Rome for a week. The VBS groups stayed in Roman-style tents, everyone worse Roman clothes..it was pretty legit. My favorite part was the marketplace, a large open area filled with tents bursting with different cool activities. Every day, each child was given a sack of gold-painted rocks (coins). Each activity cost one coin, and you could keep making things until you ran out. You could make bread, create a mosaic, make a bracelet, and do many other fun and unique activities. My favorite activity, for some odd reason, was the "fish marketplace," where you could buy either Swedish Fish or Goldfish with your golden coins. I found this magical, for some odd reason. Although I didn't have the resources to recreate this on a large scale, I wanted to give the girls an experience like it, so I created a tiny "Roman Marketplace," with various "stalls." We each took a turn being the shopkeeper and handing out coins. They absolutely ADORED it! I'm really glad that we did it. If you do nothing else on this page, I recommend this craft. The kids really enjoyed it, and I think it's something that they will remember in the future, much like my (albeit much more fabulous) childhood Roman Market.
 Bracelet making station (simple beads, wire, paper clips and safety pins to make charms. Standard bracelet stuff).
 Roman snake-bracelet making station (we never did this, but it looked like a really cool idea).

 "Flatbread" (tortilla chips).
 Olives (a popular treat in ancient Rome).
 "Fish" (Swedish fish. So healthy).

I wanted to buy Goldfish, but all they had at the market were these duck things? I bought them anyway and they tasted the same, so whatever. The girls thought they were the bomb.com, so c'est la vie. This was their favourite part, as it was mine when I was small.
So, I hope you enjoyed learning about our Roman adventures! Leave me a comment if you have any questions, and if you attempt any of these projects, I would love to see pictures! I hope you enjoy all of your summer travels, whether they take place thousands of miles away, or from the comfort of your own home.
Stick around, too; we are learning more about Japan (before I leave on 20 August!) with festivals and activities. I'll probably make a post similar to this one in the next few weeks.
***
 Visit Hobo Mama and Code Name: Mama to find out how you can participate in the next Carnival of Natural Parenting!
Please take time to read the submissions by the other carnival participants:
(This list will be updated by afternoon July 8 with all the carnival links.)
This post was written for inclusion in the monthly Carnival of Natural Parenting hosted by Hobo Mama and Code Name: Mama. This month our participants have shared their family-travel tips, challenges, and delights. Please read to the end to find a list of links to the other carnival participants.
***
I am an AP nanny, and part of the fun of my job is planning cool activities to do with my kiddos. We love learning about different countries through activities and books; celebrating their holidays, learning their languages, and so on. Although I would love to take the kiddos to each and every one of these places, I simply don't have the resources to do so; doing projects from home allows us to experience the cultures of many places, even though we cannot journey to them. Last week, per the girls' request, we learned about "Ancient Rome," with Roman-themed food, activities, and stories. This post is basically a giant photo dump with accompanying descriptions, explaining the activities that we did. We adored learning about Roman culture and society, and doing it in a hands-on manner made it more accessible for the kids. I hope that these ideas will help you--maybe they will inspire you to try a Roman week with your kids, as well!
You will need:
Bungee cord-type string
Old flip flops
Scissors
Rip out the plastic thongs of the old flip flops, so that you have a foam base with which to work.
Cut the foam base so that it will fit your child's foot.
Bore holes in the base at any place where you child says that he or she would like the strap to be placed. This can be done by inserting the scissors strait down into the spot your child indicated, and then twisting the scissors until they are through to the other side. You may need to cut out additional foam to fit the cord through, depending on how big the scissors are.
Cut the cord to the correct size, put it through the holes, and tie it to secure. Be sure that you have your child try the shoes on, to ensure that they are not too tight.
And you're done! Easy recycling project, and cheap new shoes! And they are more comfortable for kids than flip flops are, according to the girls.
Making Roman shields! Cereal box cardboard pieces, cut into the correct shape, then covered with tinfoil to make them shiny. The girls then pained on the designs themselves.
When I was in elementary school, I loooved Vacation Bible School. I got to eat (basically my favourite thing), to make cool crafts (AMAZEBALLS), and to sing songs (YESS), so I thought it was pretty much the coolest thing ever. And sometimes they gave me free toys. As you can imagine, I was thrilled.
One of my favourite Vacation Bible Schools was called "Gone Fishing." It was arranged by a few huge churches that pooled their resources to turn a large plot of land into Ancient Rome for a week. The VBS groups stayed in Roman-style tents, everyone worse Roman clothes..it was pretty legit. My favorite part was the marketplace, a large open area filled with tents bursting with different cool activities. Every day, each child was given a sack of gold-painted rocks (coins). Each activity cost one coin, and you could keep making things until you ran out. You could make bread, create a mosaic, make a bracelet, and do many other fun and unique activities. My favorite activity, for some odd reason, was the "fish marketplace," where you could buy either Swedish Fish or Goldfish with your golden coins. I found this magical, for some odd reason. Although I didn't have the resources to recreate this on a large scale, I wanted to give the girls an experience like it, so I created a tiny "Roman Marketplace," with various "stalls." We each took a turn being the shopkeeper and handing out coins. They absolutely ADORED it! I'm really glad that we did it. If you do nothing else on this page, I recommend this craft. The kids really enjoyed it, and I think it's something that they will remember in the future, much like my (albeit much more fabulous) childhood Roman Market.
Toga belt making station (the bungee cord reappears! This stuff is very versatile). We just cut the cord and tied it into belts. Super easy
So, I hope you enjoyed learning about our Roman adventures! Leave me a comment if you have any questions, and if you attempt any of these projects, I would love to see pictures! I hope you enjoy all of your summer travels, whether they take place thousands of miles away, or from the comfort of your own home.
Stick around, too; we are learning more about Japan (before I leave on 20 August!) with festivals and activities. I'll probably make a post similar to this one in the next few weeks.
***
Visit Hobo Mama and Code Name: Mama to find out how you can participate in the next Carnival of Natural Parenting!Please take time to read the submissions by the other carnival participants:
(This list will be updated by afternoon July 8 with all the carnival links.)
- Favorite Family Vacation Recipe: Staying at Home — The best family vacation Laurie Hollman at Parental Intelligence could ever recommend requires minimal packing, no hotels, unrushed travel, easy meals to everyone’s taste without a bill, no schedules, everyone’s favorite interests, and three generations playing together.
- Scared of toilets and other travel stories — Tat at Mum in search is an expert at flying with kids. She shares some of her tips and travel stories.
- Staycation Retreat for Busy Mamas — Lydia's Handmade Life gives Budget-friendly, eco-friendly staycation ideas for busy work-at-home moms.
- How We Leave It All Behind — At Life Breath Present, they don't take traditional vacations — they go on forest adventures. Here are some tips in planning for an adventure, if you don't just go spontaneously, as they have before. Plus, many pictures of their latest adventure!
- Traveling while pregnant: When to go & how to manage — Lauren at Hobo Mama discusses the pros and cons of traveling during the different trimesters of pregnancy, and how to make it as comfortable as possible.
- Our Week in Rome: Inspiration and Craft Ideas for Parents, Teachers, and Caregivers — If anyone in your family is interested in learning about Ancient Rome, if you enjoy crafts, of if you're a parent looking for a fun staycation idea, check out Erin Yuki's post for a Roman-themed week of crafts, food, and fun at And Now, for Something Completely Different.
- The Real Deal: A behind the scenes look at our "Western Adventure" — Often Facebook and blog posts make vacations look "picture perfect" to outsiders. If you only looked at the pictures, Susan's recent family vacation was no exception. In this post at Together Walking, she takes readers "behind the scenes" so they can see the normal challenges they faced and how they managed to enjoy their vacation in spite of them.
- Welcome to the Beach House! — Kellie at Our Mindful Life is in love with her family's new "beach house"!
- Road Trip to Niagara Falls — Erica at ChildOrganics writes about her first trip out of the country with just her and the kids.
- 5 Essential Things to Take on Vacation — Five things Nurtured Mamas should be packing in their suitcase for their next trip, in a guest post at Natural Parents Network.
- The Many Benefits of Camping with Friends — Do you want to go camping, but the very thought of it seems daunting? Make your life easier - and your kids happier - and go camping with friends! Dionna at Code Name: Mama discusses how much better camping can be when you join forces with others.
- My Natural First Aid Kit for Camping, Travel, and Everyday Use — Jennifer at Hybrid Rasta Mama gives us an insiders looks at her natural first aid kit for camping, travel, and everyday use. These natural remedies have saved her hide and those of others many times! You might be surprised what made her list of must-haves!
- Traveling Solo and Outnumbered — Alisha at Cinnamon and Sassafras shares lessons learned from a recent trip with two toddlers and no co-parent.
- Compromise and conviction on the road — Jessica of Crunchy-Chewy Mama shares the reality vs. the dream of travel and dishes on the compromises she makes or won't make while traveling.
- Camping Trauma — Jorje of Momma Jorje offers why she loves camping and why she and her family are a little gun shy about it, too.
- First in our Books — Writing fresh from her first family vacation, Laura from Pug in the Kitchen has realized that helping pack her parents' station wagon made for a smooth and pleasant trip that was more than she hoped for!


Oh, man, I'm trying to figure out where to start! I want to do it ALL. Thanks so much for sharing! You have the best ideas.
ReplyDeleteAw, thanks so much! I'm glad that you liked the ideas :) Please, let me know if you try any out! I invented a lot of these ideas (or used inspiration from pictures in books, ect), so I would love to see how they turned out for other people. The girls seemed to like doing the projects (Adora specifically requested a Rome themed week, so I guess she liked it last year, as well!). And aw, you flatter me too much XD Thanks for the sweet comment :) I hope you and the three kiddos (and Sam, LOL) are doing great!
DeleteI agree with Laura - great ideas! I'm curious - do you find a lot of ideas on the internet, make them up yourself, or a little of each?
ReplyDeleteThese girls are so lucky to have you - I'm sure the whole family loves you. I'm definitely feeling like I can delve a little deeper into my "crafty side" after reading this. Thanks for the inspiration - my daughter especially will thank you.
Aw, thank you so much! You are so kind to me :)
DeleteGood question! Some of each; I made up most of the ideas for these projects, but I adapted some of them from things I saw on Pinterest, or in books. I tried to link to anything that I specifically borrowed from a blog or website. Most of it I just pull out of my head, haha. Sometimes, I see pictures in the books that I read with the girls (ones about the country/time period), and then I adapt crafts from those. Glad that you are curious!
Aw, thanks. I am lucky to have them, they are such sweet kiddos. Ah, I am so glad that you enjoyed the ideas! I would love to see anything that you make :)
Laurie at Parental Intelligence
ReplyDeleteWhoa! I loved the pictures of your activities. As a child therapist, you've given me tons of ideas. Thanks.
Wow, thank you so much, Laurie! Happy creating. I hope that your kiddos enjoy them.
DeleteThese photos look like so much fun! I really appreciate you sharing! :)
ReplyDeleteThank you so much! We certainly had a good time.
DeleteThe natural clay projects are SO cool. I really want to try something like that with my littles now!
ReplyDeleteThanks so much! Yeah, natural clay is the BOMB. I totally recommend it. Free, strong when dry, and doesn't need to be baked at all. Best craft material. I hope that you and your kiddos enjoy it :)
Delete